[Summary]: Don’t know how to add Spotify music to Window Movie Maker? This article will guide you how to convert Spotify music to MP3 format supported by Window Movie Maker, and import Spotify songs into Window Movie Maker as background music for movie projects.
“How do I get a song from Spotify added to Windows Movie Maker? My friend told me that Spotify music are in DRM protected. Can you give me some advice so that I can import Spotify music to Movie Maker successfully. Thanks a lot.”
Sometimes for movie projects, you may need to import one of your favorite Spotify songs into Windows Movie Maker. However, all the Spotify songs are all protected by DRM, you cannot directly add Spotify music to Windows Movie Maker, iTunes, or other programs. But this does not mean that you have no chance to use Spotify as BGM in your movie project. By using third-party tools, you can also get your music from Spotify added to Windows Movie Maker for further operation. Let’s explore it!
Tool to Get Spotify Music Added to Windows Movie Maker
Spotify Music Converter is a powerful Spotify DRM Removal as well as Spotify Music to MP3 converter. It is specially designed to download Spotify songs & playlists without DRM protection and convert Spotify music to MP3, AAC compatible with Windows Movie Maker. After conversion, you can put Spotify music to Windows Movie Maker as BGM for your music projects.
Key Features of Spotify Music Converter:
- Unlock DRM from Spotify songs/playlists/albums.
- Download non-DRM Spotify tracks to computer for free.
- Convert Spotify music to DRM-free MP3, AAC, FLAC, WAV.
- Keep lossless quality, ID3 tags, metadata in output MP3 files.
- Use Spotify song as BGM for videos, movies, PowerPoint Presentation.
- Put Spotify song to Window Movie Maker as BGM for movie projects.
- Offline enjoy Spotify music on any device anytime, anywhere.
Part 1. Convert Spotify Music to MP3 Supported by Windows Movie Maker
Step 1.Launch Spotify Music Converter
Download and install Spotify Music Converter on your PC/Mac, simply double-click its icon to launch it. At the same time, Spotify app will be opened automatically.

Tips: please make sure that you have installed Spotify app on your computer before you start.
Step 2.Add Spotify Music to Converter
Directly drag and drop your favorite Spotify songs, album or playlist to the window of converter. If you are Spotify web users, you can also copy and paste the URL of Spotify song/playlist to the converter.

After that, click “Add” button to finish importing Spotify music to the program.

Step 3.Set Output Format as MP3 Supported by Windows Movie Maker
Click the “Option” button to freely select MP3 as the output format, and you can also adjust the sample rate, bit rate and output quality according to your needs.

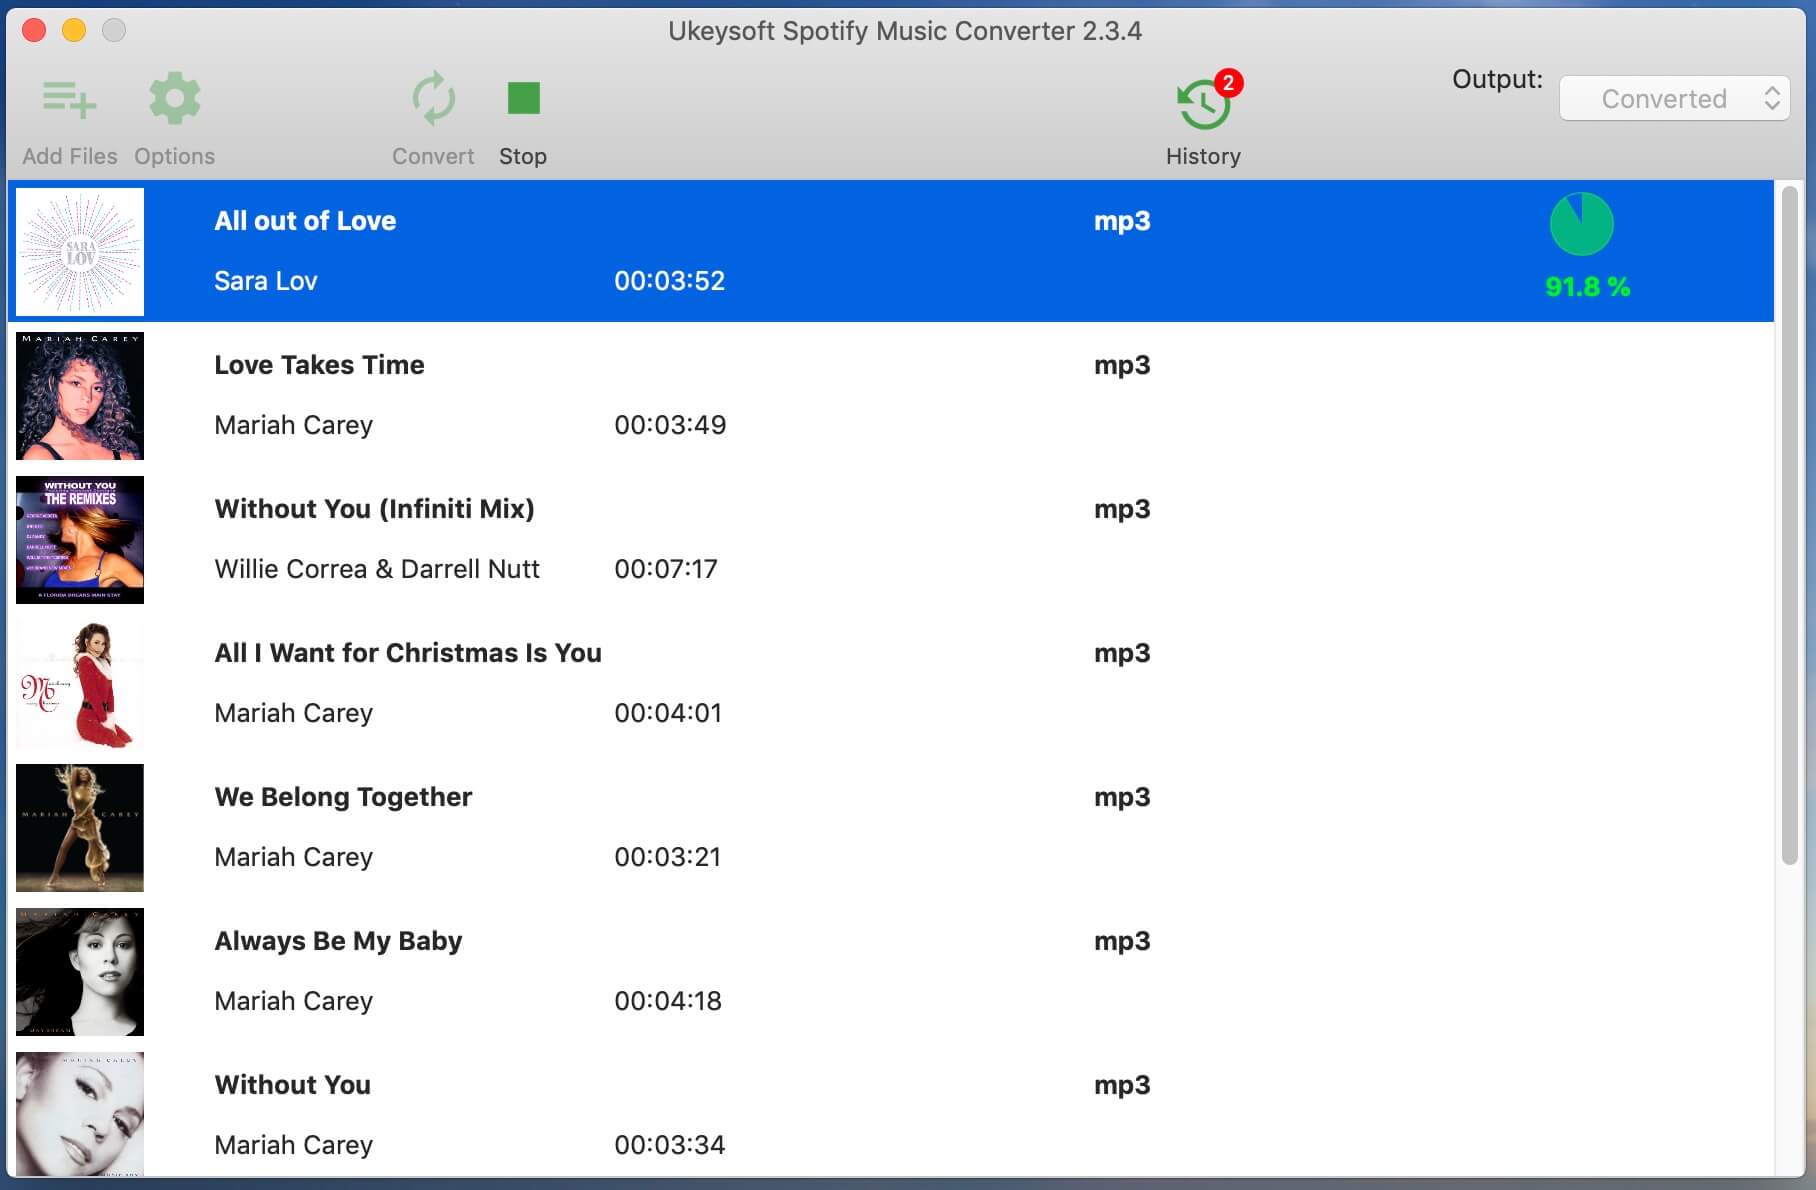
Step 4.Start Converting Spotify Songs to MP3
Click on “Convert” button, and it will start the DRM removal and conversion process.

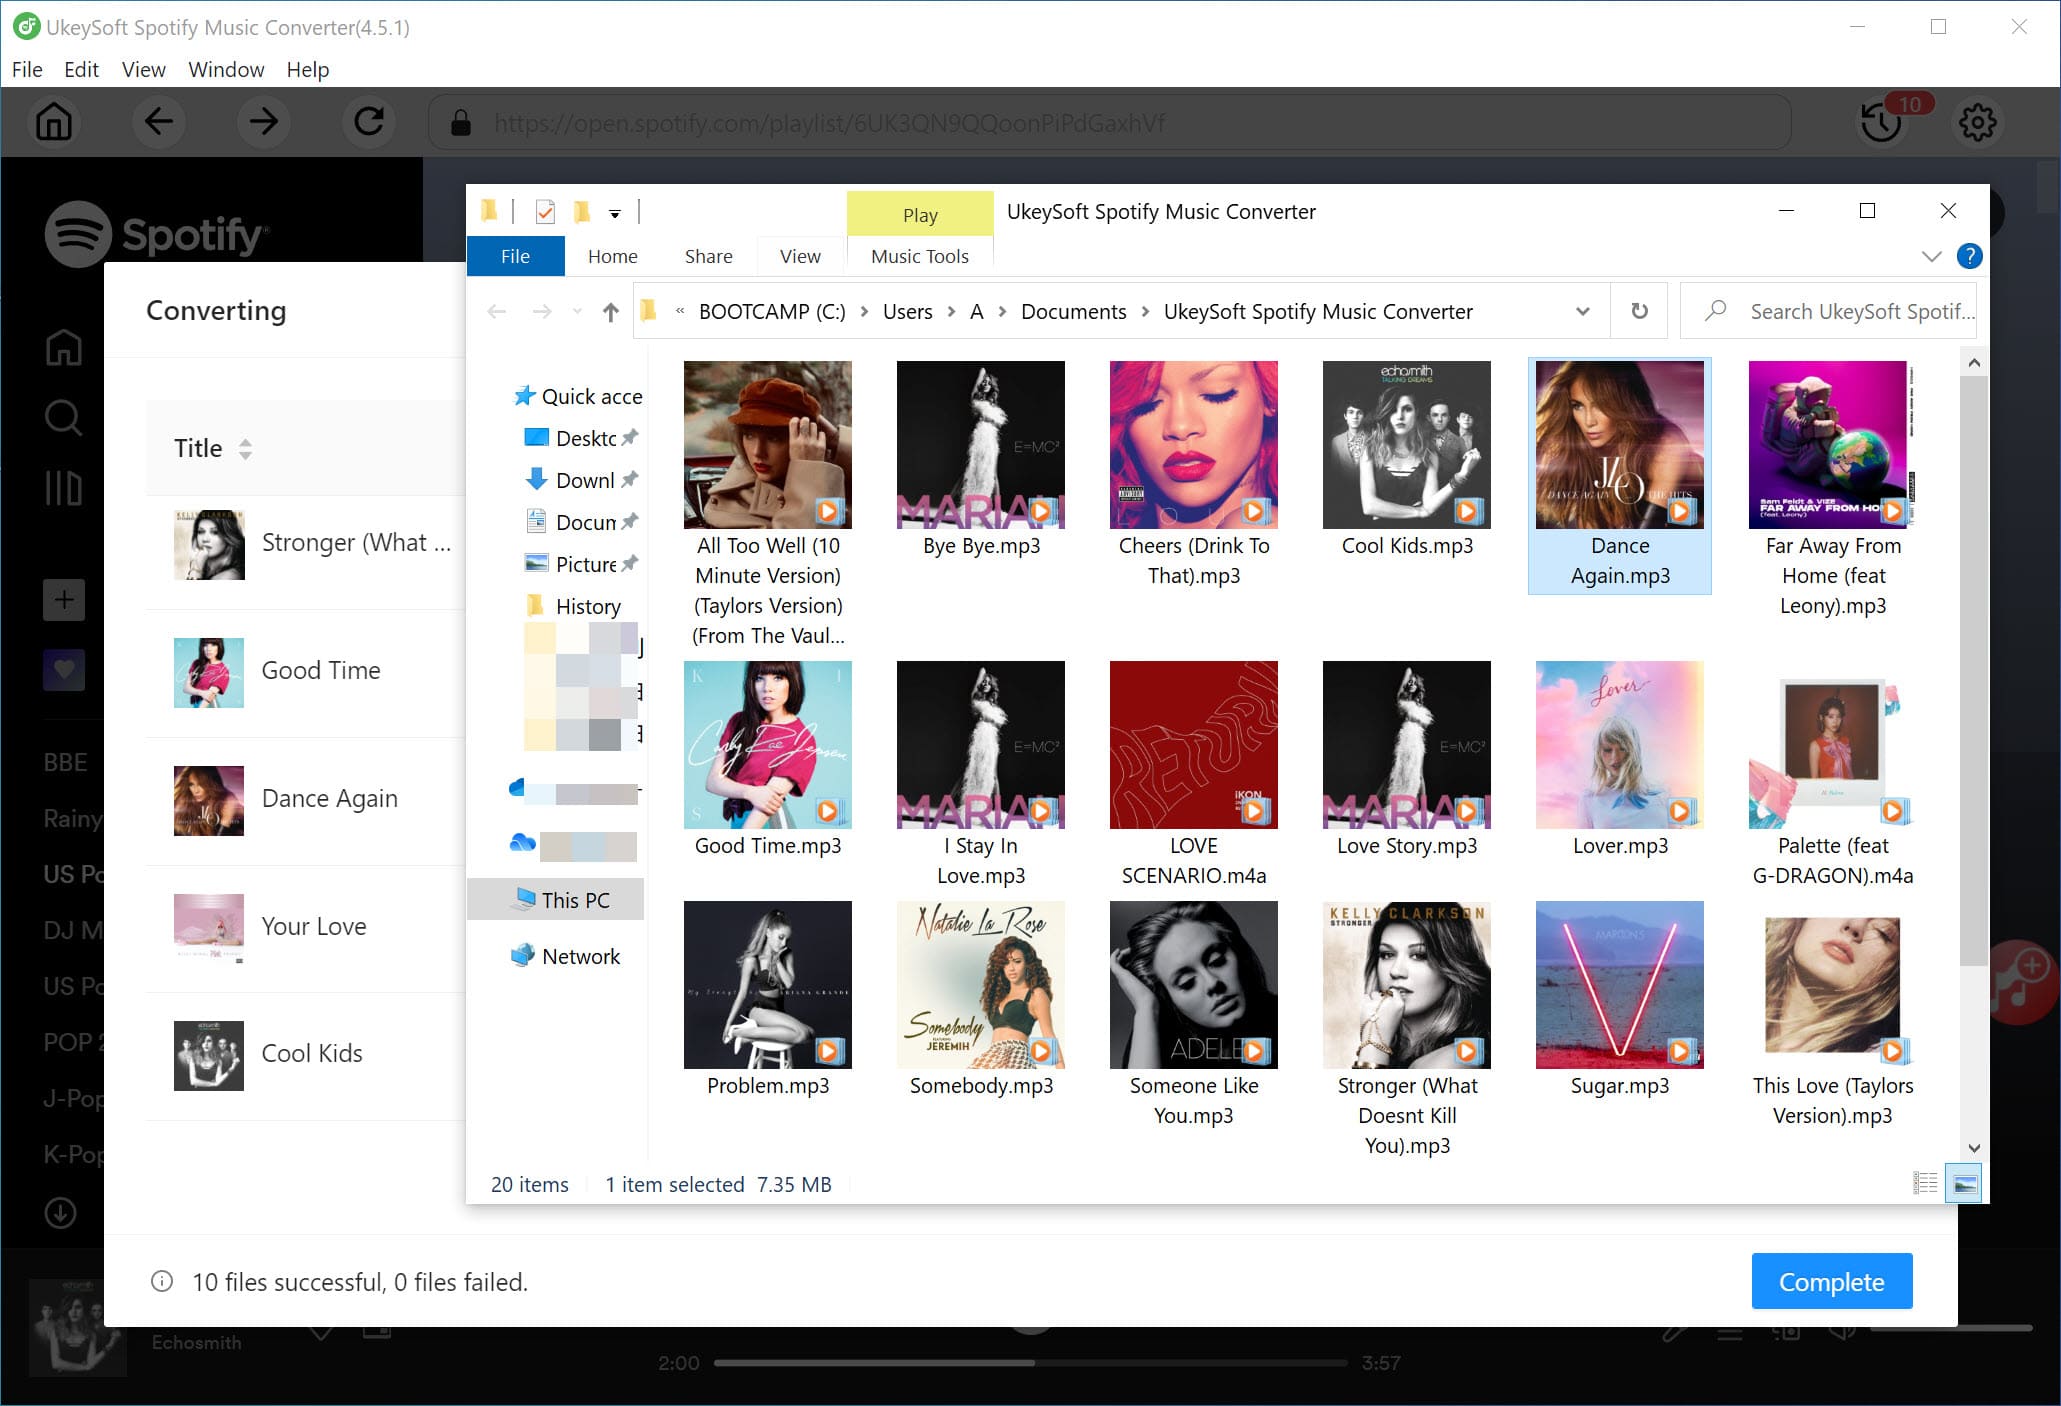
And a few seconds later, you can get the DRM-free Spotify music files saved in MP3 and you can locate the MP3 files in the “History” tab.

Part 2. Add Converted Spotify Music to Windows Movie Maker
Now all the Spotify songs have been saved on you computer forever, and you can freely add these unprotected MP3 files to Windows Movie Maker for video project. Here are the simple steps to add Spotify music to video project.
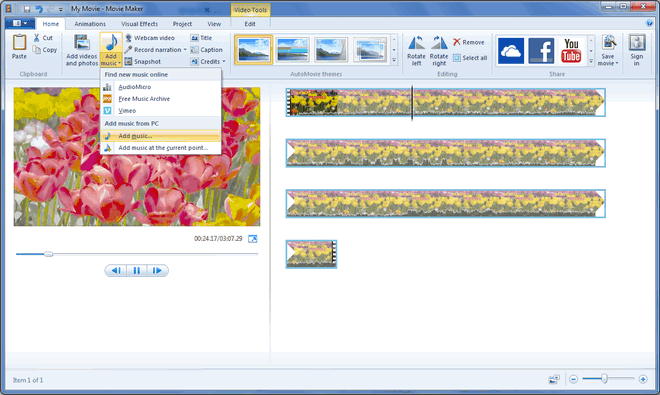
Step 1. Launch Windows Movie Maker on your PC, simply click “Import Video” under the “Capture Video” to import the video clip.
Step 2. Click “Add Music” button to add the converted Spotify song from local drive. After you added the song to the video, the song will be placed as green bars below the video clip in the timeline.

Step 3. Now you can edit the Spotify songs as you like. After that, you can save your video project with your favourite Spotify track!

